


How To Preserve Hatch Chiles
.jpg)
Post and images by guest blogger, Rebecca White, of A Pleasant Little Kitchen. 
Visit her full blog or find out more about her here.
When August hits, Randy and I roll up our sleeves and know it’s Hatch go time.
Prepping Hatch chiles to freeze for the months outside of August isn’t a work of art. All it takes is a little bit of heat and a few hours of your time…and if you like, a few friends accompanied with some tasty drinks.
Make Hatch preservation an experience that makes you want to do it every year. Buy a case, invite friends over and grill.
.jpg)
While we buy the pre-roasted Hatch chiles at Market Street for ease of use, we also enjoy stocking up on fresh chiles and roasting our own.
Rest assured and know Hatch chiles are easy to preserve and worth the time it takes.
If you follow our lead and stock up (whichever method you choose), come January when you crave the unmistakable Hatch flavor, all you’ll have to do is forage in the freezer, thaw and enjoy.
.jpg)
A few pointers when roasting chiles:
Flat chiles are the easiest to roast.
An oven or a grill is all you need.
It takes time to work through the steps.
Rubber gloves can be helpful when peeling and seeding the chiles to keep hands from getting too “Hatchy.”
A Hatch Margarita makes this experience even more enjoyable (see below for the recipe).
.jpg)
Pop on over to your local Market Street and load up your cart with Hatch green chiles. Whether you’re roasting your own or letting Market Street do the roasting work, it’s well worth it to freeze fresh Hatch green chiles to enjoy all year long. Happy Hatching!
.jpg)
How to Grill Hatch Green Chiles
1) Heat the grill to 450-500 degrees. Be sure that the coals (or burners) are ignited everywhere that you want to place the chiles. This process works best with direct heat.
2) Wash and dry the chiles.
3) Arrange the chiles on the grate leaving space between them. Be sure to lay them perpendicular to the grate to keep them from sliding through.
4) Roast for about 5 minutes. Flip the chiles and rearrange if needed for even cooking. Roast for another 5 minutes. You are looking for a good char on most of the chile and should see the skin bubbling up from the meat. Remove any that are done roasting and continue to flip and rearrange until the whole batch is done.
.jpg)
How to Broil Hatch green chiles
1) Heat the broiler to 500 degrees.
2) Wash and dry the chiles.
3) Place the chiles on a foil lined baking sheet on the top rack. Broil for 6 minutes.
4) Once blackened and blistered, flip the chiles over and continue to broil for an additional 5 minutes. If not blistered enough, broil for an addition 1 minute.
.jpg)
.jpg)
The final steps to preparing Hatch green chiles:
Once the chiles are well blistered (the chiles need to be blistered all over, this helps to loosen the skin) place in a airtight container (or zip-close bag) and let cool for about 15 minutes. This process captures steam and continues to loosen the skin from the meat.
*If you bought your chiles already roasted and don’t plan on roasting your own, you can skip straight to here.*
Once cool to the touch, remove the chiles from the container and peel off the outer layer of skin. This process, if the chile skins are well blistered, is simple. Take any loose bit of blistered chile skin and begin to pull. The outer layer will come off in a two to three peels, or if well charred the skin will flake off. Be sure to remove as much as the skin as possible.
Next, cut off the stem and slice the chile down the middle (hot dog style). Be sure not to cut through the chile, just the top portion of it. Using your hands or a paring knife, gently remove the seeds.
Place the chiles in an airtight container and place in the fridge to use throughout the week.
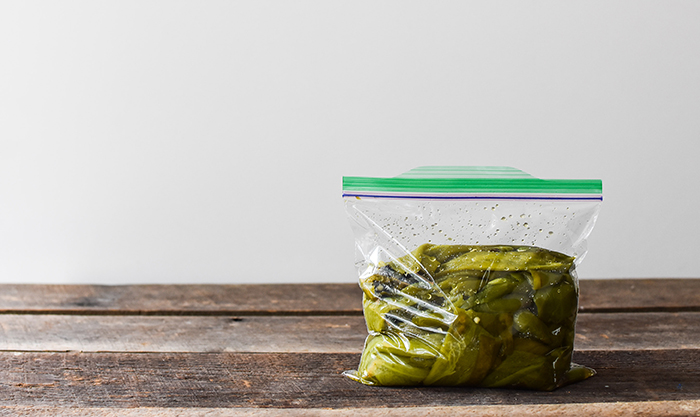
How to freeze Hatch green chiles:
Once the skin, stem and seeds have been removed, let the chiles come to room temperature.
Place the chiles into a freezer safe bag and remove as much air from the bag as you can before sealing. Lay flat in the freezer.
*an optional freezing technique is to vacuum seal the Hatch green chiles.
Hatch Green Chile Margarita
Author note: The amount of agave needed may vary depending upon the sweetness of the limeade used. Adjust accordingly.
Ingredients:
ice
2 ounces Hatch infused tequila (see below)
1/2 ounce grand marnier
2 1/2 ounce limeade
juice of 1/2 lime
1 teaspoon agave syrup
Directions:
1) Add all ingredients into a cocktail shaker (or a cup) and shake.
2) Strain and pour over ice, serve immediately.
for the Hatch infused tequila
Author note: The heat level of the infused tequila will be determined by the chile.
Ingredients:
1 Hatch green chile, stem removed and seeded
1 1/2 cups Tequila
Directions:
1) Place the green chile into a glass container. Pour the tequila over the chile.
2) Seal and let infuse for 24 hours.
3) Remove chile and strain tequila into an glass airtight container.
Category: What's New, What's Cooking, From the Aisle and Beyond