


A Pleasant Little Grilling Menu
.jpg)
Post and images by guest blogger, Rebecca White, of A Pleasant Little Kitchen. 
Visit her full blog or find out more about her here.
The heat is on, people. Literally. It's summer and it's hot outside.
Summer days are long and hot which means balmy late nights are in full swing. Those long evenings can be chock full of outdoor fun-- swimming, gathering, laughing and GRILLING.
.jpg)
One thing about A Pleasant Little Kitchen is that the cooking is not limited to indoors. Outdoor cooking and dining is one thing that makes APLK a little more special. Let me encourage you to get outdoors (bug spray and all) and cook.
This menu captures what I love most about the hot months of the year: summer's bounty. This season's produce provides the best inspiration for outdoor dining and when summer arrives I can't wait to fill my table with its harvest.
.jpg)
If you're looking for a bit of inspiration, allow this pleasant little menu to help you turn on the grilling heat:
peach and sage rosé sangria
all purpose dry rub
pimento cheese on grilled bread
chilled sliced and salted cucumbers and tomatoes
smoked chicken thighs
grilled hatch green chile baked beans
.jpg)
Yearly, Market Street provides the best tastes of summer. One of my favorite pastimes is walking into the produce section to see a variety peaches waiting to be placed in brown bags. The sweet smell is mesmerizing.
From Peach Cobbler peaches to local east Texas orchards, Market Street knows how to offer the tastes of summer through several peach varieties. One of my favorite ways to enjoy this summer delicacy is through an aromatic sangria. The crisp flavor of peaches with the dryness of rosé and the earthiness of sage is the perfect summer sip.
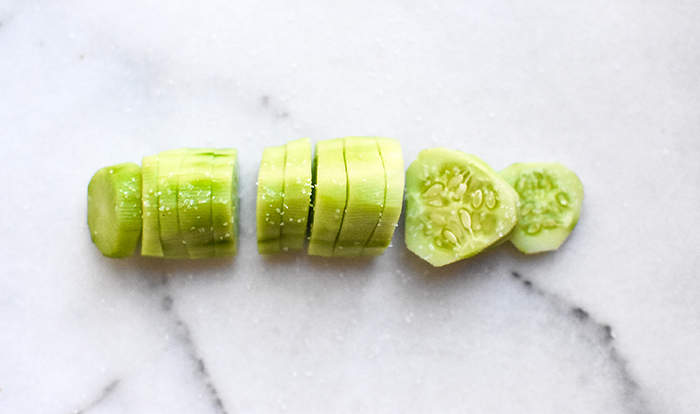
If you don't garden and fresh cucumbers and tomatoes are not waiting to be plucked, no worries, the produce section at Market Street provides you with the same backyard garden quality. Grab a few tomatoes and cucumbers to bring back those memories of childhood summers.
Grill and dine this week. Make an evening of it by inviting friends over or make it an intimate night with just you and your tribe.
.jpg)
Peach and Sage Rosé Sangria
Author note: If a smaller batch of sangria is desired, the recipe is easily halved.
Ingredients
6 cups Rosé (about two bottles)
3 ounces cognac
6 ounces sage simple syrup (recipe below)
3 peaches, diced
Directions
1. Place the peaches into a large pitcher. Pour the remaining ingredients over the fruit. Stir well.
2. Let the sangria marinate over night (or at least 6-8 hours) in the fridge before serving.
3. Serve over ice and top each drink with a sage leaf.
Sage Simple Syrup
Ingredients
1 1/2 cups water
1 cup sugar
30-40 sage leaves and stems, tied (about 5 branches of sage)
Directions
1. In a small saucepan, combine all ingredients and cook over medium-low heat. Stir occasionally. Let the syrup simmer for about 15 minutes.
2. Remove from heat, bring to room temperature and store in an airtight container in the fridge.
All Purpose Dry Rub
Author note: This spice rub requires large quantities of spices. When purchasing spices, opt for the larger size. When mixing the ingredients, be sure to break up any clumps that form. This rub can be used for a variety of meats and cooking styles.
Ingredients
1 cup brown sugar
½ cup chili powder
¼ cup smoked paprika
¼ cup dried oregano
¼ cup ground cumin
2 tablespoons kosher salt
1 tablespoon granulated garlic
1 tablespoon cayenne powder
1 tablespoon ground mustard
1 teaspoon freshly ground black pepper
Directions
1. Place all ingredients into a large airtight container and stir to combine. Seal tight and store in a dry cool place.
Pimento Cheese
Author note: This recipes uses a combination of mild cheddar and smoked gouda. If you are not a fan of smoked gouda, simply do not use it and use additional mild cheddar cheese. Add the salt at the every end. The saltiness will differ depending on the mayonnaise and type of cheese used.
Ingredients
1 tablespoon unsalted butter
1/2 cup leeks, finely chopped (white part only)
1/2 cup red bell pepper, seeded and finely chopped
1/2 cup smoked gouda, shredded
1/2 cup whipped cream cheese
1/3 cup mayonnaise
1 1/2 cup mild cheddar, shredded
4 ounces jarred pimentos, drained and chopped
1/4 teaspoon smoked paprika
1/4 teaspoon garlic powder
1/2 teaspoon kosher salt
Directions
1. In a skillet, melt the butter. Cook the leeks and bell pepper until softened, about 5 minutes. Place on a paper towel lined plate to dry and cool.
2. Place the smoked gouda, cream cheese, mayonnaise, cheddar cheese, pimentos, paprika and garlic powder into a medium sized bowl. Stir to combine. Once the leeks and bell pepper have slightly cooled, add them to the pimento cheese mixture.
3. Stir and taste. Add salt according to preference. Place in fridge.
4. Serve in sandwiches or as a dip.
Smoked Chicken Thighs
Author note: This is one of my most favorite ways to eat chicken thighs. It takes just a little extra effort and time compared to grilled chicken thighs, but the results are well worth it. Serve by themselves or with a range of dipping sauces (buffalo, barbecue, green chile aioli, etc.). This recipe is easily doubled, but it may take two rounds of smoking to complete (depending on grill size). To reheat, place the chicken in the oven heated to 350 degrees and heat thru, about 10 to 15 minutes.
Ingredients
8 bone-in and skin-on chicken thighs
3 tablespoons all-purpose dry rub (recipe above)
1 teaspoon kosher salt
Directions
1. Thirty minutes to 1 hour before smoking the chicken, remove from the fridge and bring to room temperature.
2. Lay the chicken thighs onto a flat pan or baking sheet and evenly distribute the spices and salt.
3. Heat the grill to medium-high, around 300 to 350 degrees. Once the grill has come up to temperature, follow your preferred method for introducing smoke to your grill. Either wood chips or bulk smoking wood work fine.
4. Place the chicken onto the grill and smoke for 1 hour. Halfway through the smoking process, turn and rotate the chicken for even cooking.
5. Remove from the heat and cover for 10 minutes. Serve warm.
Hatch Green Chile Baked Beans
Ingredients
3 slices bacon, cut into 1/2 inch pieces
3 cloves garlic, chopped
1 1/2 cups yellow onion, diced
3 teaspoon tomato paste
8 ounces lager beer (I used Shiner Bock)
4 ounces water
1/2 teaspoon ground mustard seed
1 1/2 teaspoon kosher salt
2 teaspoon dijon mustard
1 tablespoon maple syrup
1 tablespoon apple cider vinegar
2 tablespoon brown sugar
1 1/2 cups chopped broiled Hatch green chiles (recipe below)
2 cans navy beans, rinsed and drained
Directions
1. Heat oven to 350 degrees.
2. In a large cast iron skillet, combine bacon, garlic and onion. Cook on medium heat for 10 minutes, stir occasionally.
3. Add tomato paste and green chiles to the skillet. Cook for an additional 5 minutes, stir occasionally.
4. Pour beer and water into the skillet, and deglaze the pan. Bring to a boil.
5. Add mustard seed, salt, dijon, syrup, vinegar, brown sugar, green chiles and beans. Stir well to combine. Bring to a boil.
6. Place the skillet into the oven and cook for 1 hour, stir once. Serve warm.
Broiled Hatch Green Chiles
Author note: Hatch green chiles appear in August. It is easy to preserve Hatch green chile season through freezing. Come January when you crave the unmistakable Hatch flavor, forage in the freezer, thaw and enjoy.
Directions
1. Heat the broiler to 500 degrees.
2. Wash and dry the chiles.
3. Place the chiles on a foil lined baking sheet on the top rack. Broil for 6 minutes.
4. Once blackened and blistered, flip the chiles over and continue to broil for an additional 5 minutes. If not blistered enough, broil for an addition 1 minute.
5. Once the chiles are well blistered (the chiles need to be blistered all over, this helps to loosen the skin) place in a airtight container (or zip-close bag) and let cool for about 15 minutes. This process captures steam and continues to loosen the skin from the meat.
6. Once cool to the touch, remove the chiles from the container and peel off the skin, cut off the stem and remove the seeds.
7. Place the chiles in an airtight container and place in the fridge to use throughout the week.
Category: What's Cooking